


Whether you’ve recently invested in a new walk-in shower or considering treating yourself, it’s a must to know how to care for it. With regular and proper care, you can rest easy knowing your it will last for years.
But cleaning a walk-in shower differs from cleaning a regular shower. That’s why we’re sharing our top shower cubicle cleaning tips and step-by-step instructions.
Get a FREE Brochure
Simply complete our form to see a full range of bathing solutions & their key features. It takes no time at all!
- What is a walk-in shower?
- Why is cleaning your shower so important?
- Our top tips for cleaning your walk-in shower
- How to clean a walk-in shower in 7 steps
- Final checks
What is a walk-in shower?
Unlike traditional showers, wet rooms or walk-in baths, walk-in showers don’t have a door. Instead, glass panels are installed to partition the shower from the rest of the bathroom to prevent water from reaching places it shouldn’t. Not only do they offer better accessibility and a safer showering experience, but they’re also much more modern and sleeker in style.
Why is cleaning your shower so important?
Many individuals choose to install one in order to enjoy a safer bathing experience at home. As a beloved home amenity, your shower is likely to be used on a regular basis – if not daily. In turn, this creates the need for your shower to be cleaned on a regular basis too. Without the proper care and attention these facilities need, you’re likely to have certain bacteria growing in places it shouldn’t.
Before jumping into the step-by-step instructions on how to give your shower a thorough scrub down, here are a few cleaning tips to get you started on the right path.
Our top tips for cleaning your walk-in shower
1. Clean it regularly
The number one tip to remember is to clean your walk-in shower as often as possible, ideally after each use. Regular cleaning is the best way to ensure it looks and performs as good as new. In doing so, you will lessen the size of the job and instead be able to keep on top of maintenance much easier. A deep clean can then be completed once a month to ensure your shower is always kept in top condition.
The easiest way to do this is to make it part of your shower routine. By using mild cleaning products such as limescale remover after each use, as well as wiping down the surfaces, your walk-in shower will always remain clean. In turn, you can avoid the arduous task of scrubbing down the whole facility.
2. Use the right products
Having the right tools for the job makes the job much easier. Purchasing effective products and equipment will ensure your walk-in shower is well looked after and also makes the cleaning process easier for you.
Different areas of the shower will most likely require different cleaning products. For example, products to clean your tiles or backsplash area will be needed to make them sparkle alongside a tub cleaner to clean the shower tray. If you’d prefer not to spend much money on cleaning products, you can always opt for regular soap, or some people swear by white vinegar and a cloth to remove build up alongside baking soda to remove those particularly challenging areas.
An extendable bathroom cleaner would be ideal to keep nearby and will come in particularly useful if you experience mobility issues as you won’t have to stretch to reach those hard-to-reach places. As well as this, you’ll need durable sponges and cloths to scrub out any dirt and grime with ease. A microfiber cloth may also come in useful to dry out your shower area once you’re done cleaning the area – this will ensure a sparkling clean finish.
Want to check that you’ll have everything you need to clean your walk-in shower? Take a look at the list below and tick off your products:
- Durable sponge
- Cleaning cloths
- Microfiber cloth
- Extendable bathroom cleaner
- Tub cleaner
- White vinegar and baking soda
- Tile cleaner
Don’t forget to keep your cleaning products stocked up to make those deep cleans easier to complete when the time is right.
3. Timing matters
When it comes to cleaning your walk-in shower, timing can make the job a whole lot easier. The best time to clean a shower is straight after you’ve used it, as the hot air and water will loosen up any grime, in turn automatically making the task at hand that little bit easier.
Rather than leaving the dirt in your shower to build up over time and multiple uses, keeping on top of it after each use will help you get the most out of your amenity. However, when the time comes to complete a deep clean, we have seven steps to follow that will give you a sparkling finish.
How to clean a walk-in shower in 7 steps
Some key steps are worth following when it’s time to deep clean your shower. Our step-by-step guide will ensure you can provide your shower with the care it deserves to keep it in top condition and your showering experience at its best.
Step 1
First things first, remove everything out of your shower. Whether it’s shampoo and conditioner bottles, soap bars, slip-resistant mats or anything else, you’ll want your walk-in shower to be completely empty in order to give it the most thorough clean possible. It will also help to make the job easier, so you’re not battling with bottles here, there and everywhere.
These items can simply be put to one side in your bathroom until you’re finished and ready to place them back in your shower again.
Step 2
Next, take the cleaner that you’ve bought to clean your tiling or splash back and spray the walls. It’s important to let this sit for at least three minutes in order to allow the cleaner to really work its magic by digging deep into grime. Be sure to complete this step before you clean your shower floor as you will more than likely need to be within the shower itself to clean the walls.
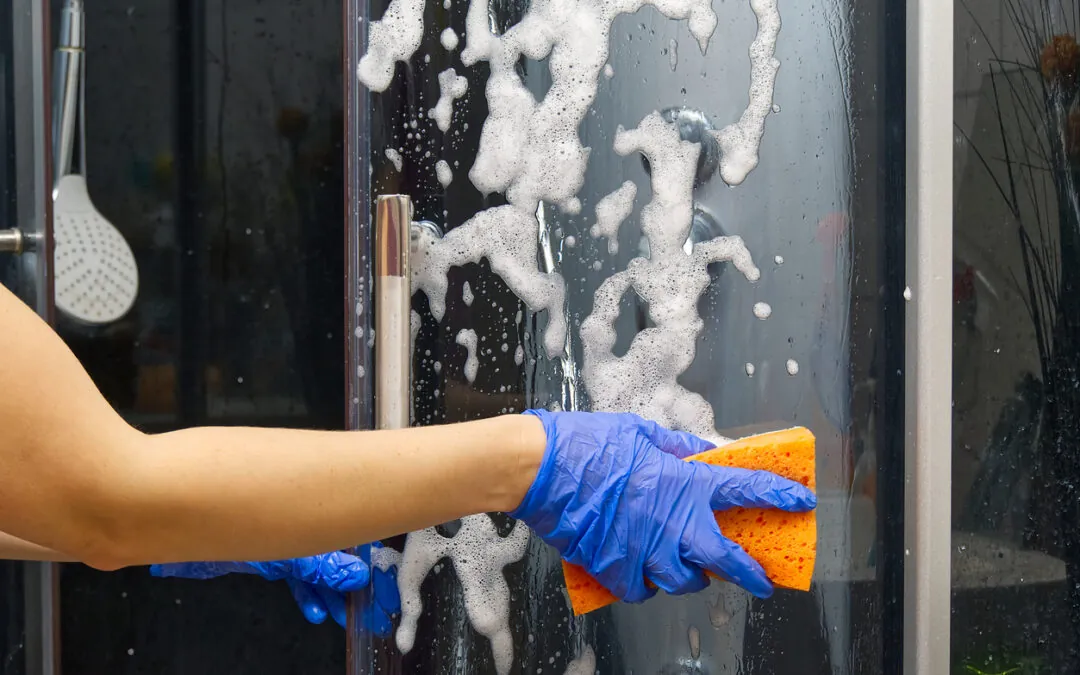
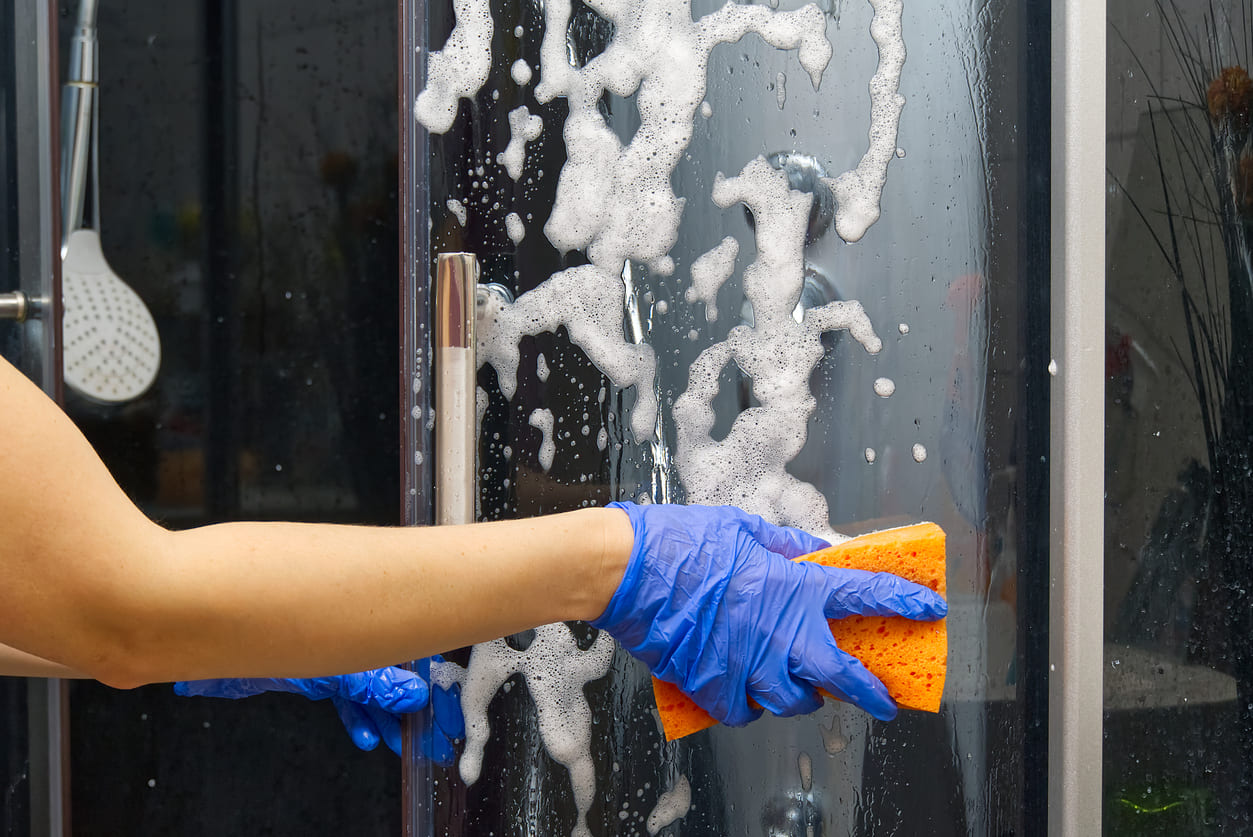
If you have a glass partition as part of your walk-in shower, this is a good time to clean it alongside your shower walls. A glass cleaner could be used to do this effectively or white vinegar would also work well. Use a spray bottle to complete this process before wiping down with a sponge to remove build up on the glass.
Step 3
Now that your tile cleaner has had the opportunity to soak in, it’s time to get scrubbing. Start at the top of the walls and slowly work your way down to the shower tray to ensure no areas are missed.
If there’s a substantial amount of grime and build up in your walk-in shower, you may find that your shower needs more than just the tile cleaner. This is where baking soda can come in handy, allowing you to really get into those nooks and crannies to break down dirt. An old toothbrush could even be used to cover those smaller areas with ease.
Step 4
Once you’re happy with how your walls are looking, it’s time to focus your attention on the shower tray. Spray the floor with your cleaner of choice and use a sponge or brush to scrub away dirt. Don’t forget to clean in the corners where grime is likely to build up.
Be sure to take the necessary precautions to keep yourself safe while completing this step as the floor will quickly become slippery once product has been applied.
Step 5
Once you have completed step three and four as many times as your shower needs, it’s important to wash away the soap suds. If you have an extendable shower head, it can be extremely helpful at this point allowing you to wash away product to reveal a clean shower, or areas that need to be revisited.
Step 6
Once you’ve hosed down your shower and ensured it’s entirely grime-free, take your microfiber cloth to dry out the full shower area. This is an extremely important step that shouldn’t be forgotten about otherwise you run the risk of mildew growing within your walk-in shower.
Step 7
Last but not least, before you’re finished cleaning your walk-in shower, don’t neglect the shower head or temperature gauge as dirt can often be hiding in these commonly forgotten areas. Soap and water can be used on these areas and a dry microfiber cloth will ensure the space has been thoroughly cleaned.
Final checks
Once you’ve finished cleaning your shower, you should take the time to inspect it to ensure no spots have been missed. Cleaning may seem like a tiresome effort but it’s well worth your time. Unfortunately, even a small patch of dirt can produce bacteria in your bathroom which can lead to bigger, more expensive problems in the future.
If you want to find out more about caring for your walk-in shower or wet room or are interested in purchasing one if you haven’t already, please check out our enquiries page.